Mono Scribble Graphic 3: Real Talk for Embroidery Designers
When I first opened Mono Scribble Graphic 3, I wasn't sure what to expect. The name suggested something loose, hand-drawn, perhaps a little raw. What I found was a design that sits in an interesting place between deliberate artistry and casual mark-making. As someone who spends hours testing embroidery files before they ever touch a client project or a shop listing, I've come to appreciate designs that offer both visual impact and stitching reliability. This one does both, but not without a few trade-offs that any serious embroiderer should consider before committing thread to fabric.
Let me walk through what this design actually feels like in hand, how it behaves across different materials, and where it truly shines for craft businesses, Etsy sellers, and anyone making personalized goods for real customers.
First Impressions: What Mono Scribble Graphic 3 Brings to the Table
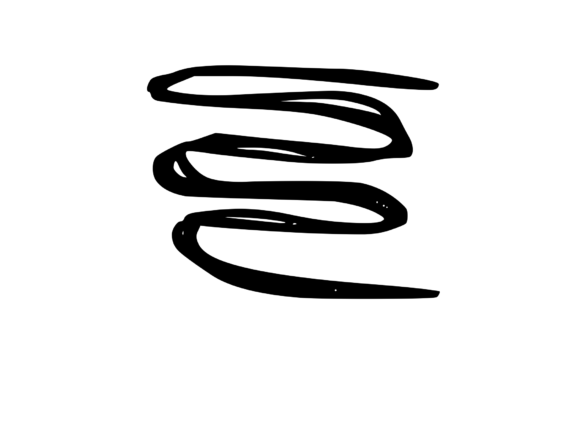
The overall mood of Mono Scribble Graphic 3 is energetic and slightly unpolished in a deliberate way. It has that sketched, almost scribbled aesthetic that feels modern and approachable. The letterform carries a kind of motion that reminds me of marker on paper—expressive, a little uneven, but full of character. That personality is exactly what many small shop owners look for when they want to differentiate their products from mass-market embroidery. It doesn't feel factory-made. It feels like someone sat down and drew it, which is a rare quality in many machine embroidery design files.
In terms of layout and detail level, this design is relatively straightforward. There are no intricate fills or dense stitch patterns that would make you nervous about hooping. The lines are the main event, and that simplicity is a strength. It belongs naturally on projects where you want the message or letter to be the hero—custom apparel, tote bags, baby gifts, and even home decor items like pillow covers or tea towels. It also works beautifully for embroidered patches if you want that handmade, art-studio feel without the fuss of complex digitizing.
How It Performs in Real Embroidery Situations
I tested Mono Scribble Graphic 3 on several common substrates: a mid-weight cotton sweatshirt, a structured tote bag, a baby onesie, and a cotton twill cap. Each material told me something different about how this design behaves under the needle.
- Sweatshirt embroidery: The design stitched cleanly on a medium-weight fleece. The scribble lines held their shape without distorting, and the slight stretch of the fabric didn't pull the lettering out of proportion. I used a cutaway stabilizer and a medium hoop, and the result looked crisp with that intentional hand-drawn texture.
- Tote bag design: On a heavy canvas tote, the design really came alive. The fabric's stiffness gave the stitches excellent definition, and the scribbled look felt grounded and purposeful. This is a strong candidate for boutique totes or custom shop merchandise.
- Baby embroidery: On a lightweight onesie, I had to be careful. The design's open lines mean there isn't much stitch density to hold the fabric steady, so a good stabilizer is non-negotiable. It worked, but I wouldn't recommend it for very thin or stretchy baby knits without a sticky-back stabilizer and careful hooping.
- Cap embroidery: This is where I hit a small snag. The curved surface of a cap frame can distort linear designs, and the scribble's uneven line weights made it look slightly wobbly on the crown. For flat-front caps or structured panels, it's fine. For curved brims or unstructured caps, test first.
For custom apparel like t-shirts and hoodies, the design is a solid choice. It also works well for embroidered patches because the open linework allows the patch fabric to show through, adding texture. Aprons, pillow covers, and kitchen towels all handled the design without issue, as long as the fabric wasn't too slippery or too thin.
Where to Use This Design Carefully
Mono Scribble Graphic 3 is not a one-size-fits-all file. Its strengths come with a few conditions that every embroidery designer should keep in mind.
- Small hoop sizes: If you're working with a 4x4 hoop, the design needs to be scaled appropriately. The scribble lines can lose their character if reduced too much, so test a scaled-down version on scrap fabric before committing to a final product.
- Textured fabrics: On fleece, terry cloth, or boucle, the uneven line weights can get lost in the nap. The design relies on clear contrast between stitched lines and background, so smooth fabrics work best.
- Thin or stretchy fabric: As noted, lightweight knits and single-knit jerseys require extra stabilization. Without it, the design can pucker or distort, especially around the tighter curves of the lettering.
- Dark fabric: The design is monochrome by nature, which is great for bold contrast. But on very dark fabrics, you'll want a thread color that pops—white, bright yellow, or a metallic can work. Avoid using dark thread on dark fabric, or the scribble effect will disappear entirely.
- Layered garments: If you're embroidering over a seam, pocket, or layered area, test first. The open linework doesn't have the density to cover up uneven layers, so placement matters.
- Frequent washing: For items like kitchen towels, baby clothes, or everyday tote bags, the design holds up well if stitched with quality thread and a proper stabilizer. The satin and running stitches in the design are durable, but I'd recommend a light to medium density for high-wash items.
Visual Appeal, Product Value, and Customer Trust
From a buyer's perspective, Mono Scribble Graphic 3 communicates a specific mood: creative, personal, and a little artsy. That matters in the handmade market. When a customer sees this design on a personalized gift or boutique product, they feel like they're getting something that wasn't mass-produced. That perception directly affects product value and customer trust.
For Etsy sellers and small shop product creators, this design can elevate a simple sweatshirt or tote into a handmade product that feels intentional. It works well for holiday embroidery if the lettering or motif fits a seasonal theme, and it's a strong candidate for wedding gifts or personalized gifts where the recipient appreciates a handcrafted look.
Brand consistency is another factor. If your shop leans toward modern, minimalist, or artistic styles, this design fits naturally. It's not overly decorative, which means it doesn't compete with other elements on a garment. It lets the item breathe while still making a statement. That restraint often leads to higher buyer engagement because the design feels curated rather than cluttered.
For digital product sellers and those creating printable mockups, the design's clean lines render well in digital previews. It's easy to photograph on finished products, and the black-and-white nature of the scribble means it photographs consistently across lighting conditions. That's a practical advantage for listing photos on any platform.
Practical Embroidery Designer Notes Before You Stitch
Before you use Mono Scribble Graphic 3 in a client project or for your own shop, here are the steps I take for every new embroidery file, and this one is no exception.
- Test on scrap fabric first. This is non-negotiable. Even simple designs can behave unexpectedly on certain materials. Run a test stitch on a fabric similar to your final product.
- Check thread color contrast. The scribble effect depends on the thread standing out against the background. Test both light and dark thread options to see which version has more visual impact.
- Review stitch density. The design uses running and satin stitches primarily. Make sure the density is appropriate for your fabric—too dense can cause puckering on lightweight materials, too loose can look sloppy on thick fabrics.
- Confirm hoop size. Verify that the design fits comfortably within your hoop with enough margin for stabilization. If you're working with a small hoop, consider scaling the design without losing the line character.
- Inspect small details. Zoom in on the digital file to check for any tiny loops, sharp angles, or narrow gaps that might cause thread breaks or poor registration.
- Test in black and white mockups. Before stitching, create a simple black-and-white preview to see how the design reads at a distance. If the lettering is unclear in a mockup, it will be even less clear on fabric.
- Compare light and dark fabric backgrounds. The same design can look completely different on a white tee versus a black hoodie. Test both scenarios if you plan to offer the design on multiple color options.
- Use proper stabilizer. For most applications, a medium-weight cutaway stabilizer works well. For stretchy or thin fabrics, add a topper or use a sticky-back stabilizer to minimize distortion.
- Check licensing terms. Since Mono Scribble Graphic 3 is offered as a Graphic in the Crafts category, confirm whether the license covers commercial use for finished products and digital product sales. If the terms aren't clearly stated in the product description, reach out to the seller before using it for client work or shop inventory.
- Plan your finished product presentation. Whether you're making a custom apparel item, an embroidered patch, or a personalized gift, the way you present the finished piece matters. Press the item well, trim any loose threads, and photograph it in natural light to capture the scribble texture.
Final Thoughts From the Hoop
Mono Scribble Graphic 3 is a design that rewards careful preparation. Its charm lies in its imperfection, but that imperfection only works if the stitching is clean and the fabric is chosen wisely. For embroidery designers who appreciate a hand-drawn aesthetic and want to offer something that feels personal without being fussy, this file is worth adding to your library. It's particularly strong for tote bag design, sweatshirt embroidery, and baby embroidery projects where the recipient values a creative, one-of-a-kind look.
If you're an Etsy seller, a craft business owner, or a creative entrepreneur building a line of handmade products, this design gives you a versatile tool that works across multiple product categories. Just remember to test thoroughly, match your stabilizer to your fabric, and respect the design's limitations on curved surfaces and lightweight knits. Done right, Mono Scribble Graphic 3 can become a reliable part of your design assets for both personal projects and commercial embroidery work.
As with any machine embroidery design, the real test is in the stitching. But from where I sit, after running it through several hoops and a range of materials, this one earns its place in the rotation. Use it with intention, and your customers will feel the difference.